
Hydrangeas, with their lush foliage and grandiose blooms, have long captivated the hearts of gardeners worldwide. Propagating hydrangeas from cuttings is a rewarding way to multiply these beautiful shrubs without needing to purchase new plants. This guide simplifies the process, outlining easy steps for even the novice gardener to successfully grow hydrangeas from cuttings.
Why Propagate Hydrangeas from Cuttings?
Benefits of propagating hydrangea cuttings
Propagating your favorite hydrangea offers several advantages. It’s an economical way to create more plants, ensuring a garden full of these beautiful flowers. Additionally, cuttings from a mature hydrangea plant are genetically identical to the parent plant, ensuring that the unique characteristics of your favorite hydrangea are preserved in the new hydrangea plants.
Understanding the success rate of hydrangea propagation
The success rate of taking hydrangea cuttings and turning them into thriving shrubs is surprisingly high, making it an enticing method for beginners. With proper care and the right conditions, many cuttings will develop new roots and grow into healthy hydrangea bushes.
Comparing propagation methods for hydrangeas
While there are several methods to propagate hydrangeas, using stem cuttings is often regarded as the most straightforward and effective way to create new plants. Other methods, such as layering or seeding, have their benefits but typically require more time or may result in variations from the parent plant.
How to Take Hydrangea Cuttings for Propagation
Identifying the best time to take hydrangea cuttings
The best time to take hydrangea cuttings is in the early morning when the plant is fully hydrated. Aim for late spring to early summer, when the shrub’s new growth is tender yet mature enough to support root development.
Choosing the right part of the hydrangea for cutting
Select healthy, non-flowering stems for your cuttings. Look for stems that have new growth but are not too tender. A perfect cutting starts with a healthy parent plant, ensuring the new hydrangea will inherit robust characteristics.
The anatomy of a hydrangea cutting: node, stem, and leaf
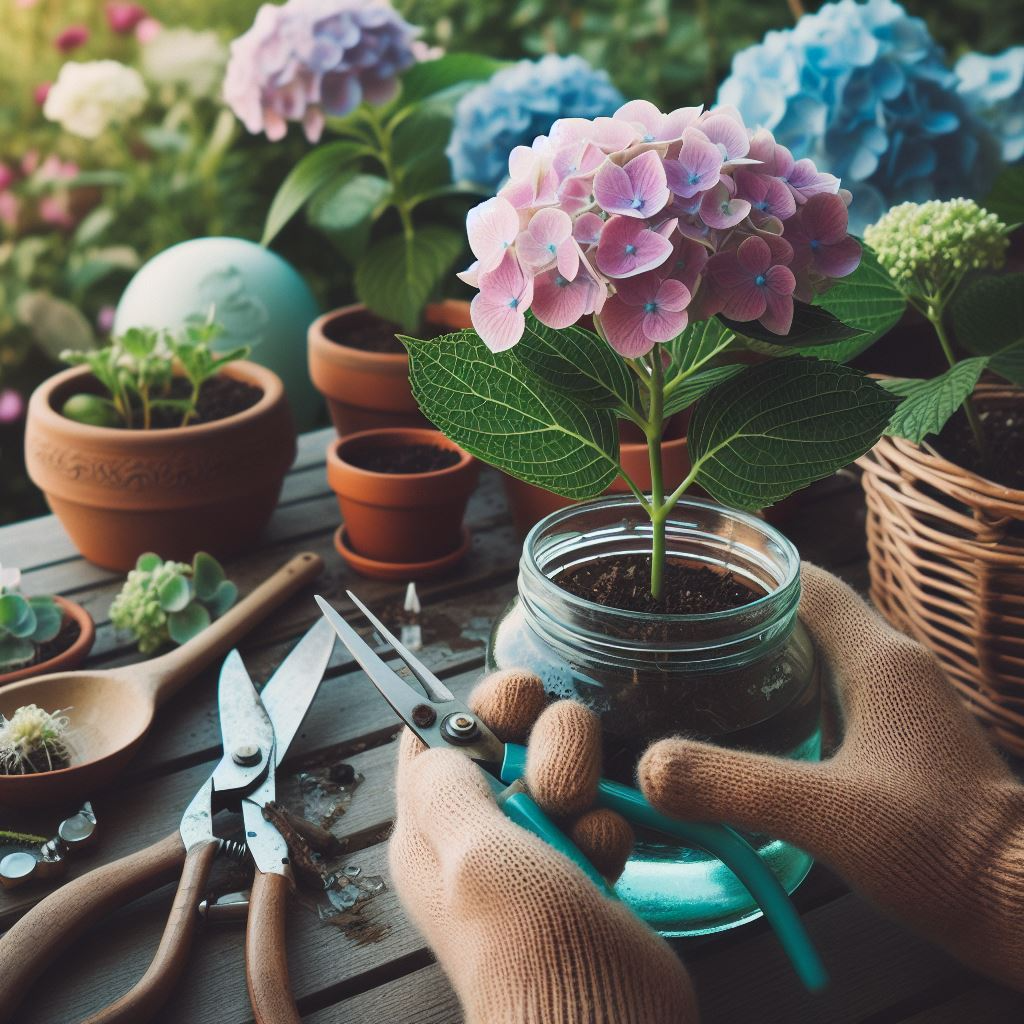
A successful hydrangea cutting typically includes a stem about 6 inches long with at least three sets of leaves. The node, where the leaf meets the stem, is crucial as this is where new roots are most likely to develop. Remove the lower set of leaves to expose the nodes and create a cutting primed for rooting.
Prepping Your Hydrangea Cuttings for Success
How to use rooting hormone for hydrangea cuttings
Applying rooting hormone to the cut end of your hydrangea cutting can significantly enhance root development. Dip the end of the cutting into rooting powder or liquid, ensuring the exposed node is well coated. This step increases the chance of your hydrangea cuttings taking root.
Preparing the ideal potting mix for hydrangea propagation
Use a potting mix that is light and drains well to promote healthy root growth. Mixing perlite or vermiculite with peat moss can create an ideal environment for new roots to develop. The goal is to keep the cutting moist without becoming soggy.
Creating the optimal environment for root development
Maintain your hydrangea cuttings in a warm, humid environment away from direct sun. A plastic bag loosely placed over the pot can help retain moisture, simulating a greenhouse effect. Be mindful to provide some ventilation to prevent mold growth.
Rooting Hydrangea Cuttings: Step-by-Step
Planting your hydrangea cutting in the potting mix
After preparing your cutting and potting mix, insert the stem into the soil, ensuring at least one node where the leaves were removed is buried. This is where new roots are expected to sprout. Lightly water the soil to settle your cutting into its new home.
Moisture control: Ensuring your cutting stays hydrated but not waterlogged
Keeping the soil consistently moist is key during the early stages of root development. However, overwatering can be detrimental, leading to root rot. Check the moisture level regularly, and adjust your watering schedule to prevent the soil from becoming soggy.
When to transplant your new hydrangea plant to the garden
Once your hydrangea cutting has developed a robust root system, it’s time to transplant it into the garden. This typically occurs a few months after rooting, when the root system is strong enough to support the plant in a more competitive environment. Choose a location that receives partial shade to protect your new hydrangea from the intense afternoon sun.
Common Problems and Solutions in Hydrangea Propagation
Dealing with common pests and diseases during propagation
Keep an eye out for common pests and diseases that can affect young hydrangea plants, such as aphids and powdery mildew. Maintaining proper hygiene in your propagation area and using appropriate treatments can help prevent these issues.
What to do if your hydrangea cutting fails to root
If a cutting fails to develop new roots, examine your propagation process for potential issues, such as improper moisture levels or inadequate use of rooting hormone. Adjusting your technique and trying again can often lead to success.
Tips for increasing the success rate of hydrangea propagation
Increasing the success rate of your hydrangea propagation efforts involves several key practices: using healthy parent plants, applying rooting hormone effectively, creating an ideal rooting environment, and practicing patience. With time and experience, propagating your favorite hydrangeas from cuttings can become a joyful and rewarding aspect of gardening.